All about Motor Selection and the Motor Database
Selecting motors for your flight simulations is a fundamental part of using OpenRocket. While many aspects of motor selection may be pretty obvious, there are some subtleties and semi-hidden features that might not be apparent at first glance. This tutorial will cover just about everything there is to know on the subject, including how to add your own motors to the database.
Contents of this tutorial:
About the Motor Database in OpenRocket
Each time a new version of OpenRocket is released, the complete database of motors from thrustcurve.org is imported into it. Therefore, the only time you should ever need to add your own motor files is if either (a) a commercial motor is newer than the last release of OR, or (b) the motors are non-commercial (i.e. home-made or experimental).
Adding your own motor files
On the occasion that you do need to add a motor, it’s as simple as taking a motor file (.eng or .rse) and placing it in the motors folder of your OR installation. You can see where that is in the first tab of preferences:
Note that the screenshot shows the thrustcurve folder set to somewhere on my DropBox, so all the machines on which I use OR can share it. Using any folder of your own is usually better than sticking with the default location, but it’s up to you. You can also set a list of folders to use; just separate the path names with a semicolon.
Handling motor files with errors
It is pretty common that homemade thrust curve files have some sort of formatting error, which causes OR problems at launch when they are loaded. Starting with version 23.09, OR will report the exact error it finds, which should give you a hint how to fix it. The errored file is then ignored.
The Motor Selection Dialog
When you create a new motor configuration, OR will automatically open the motor selection dialog for you. Later on, if you want to change it, you can do so by clicking on the motor in the table and then the Select Motor button.
Let’s take a quick tour of the motor selection dialog:
-
At the top are controls to let you customize the
ThrustcurveandDelayof your selected motor. We’ll come back to this. -
A couple of simple filters for the list, self-explanatory.
-
What name to use for the motors.
Common nameis typically just motor class and thrust (e.g., C18), whileManufacturer's designationtypically includes suffixes to identify propellant and occasionally other bits of info (e.g., C18W). Choose whichever you’re most comfortable with. -
The list of motors that pass your filters. Click on the column headers to sort on that column. Note that when you select a reload, the case is included automatically.
-
A
Search fieldfor the motor list, easily overlooked due to its placement below the list. Search terms will match any of the columns. -
The
Filter Motorstab gives a whole bunch more filters, mostly self-explanatory. -
The
Show Detailstab gives detailed info on the selected motor type, mostly duplicating what you’d find on thrustcurve.org (because that’s where the info is coming from). It also shows the thrustcurve(s) for the motor. We’ll come back to this as well.
Thrust Curve and Ejection Delay
The selectors at the top of the dialog for thrust curve and motor delay are the source of a surprising amount of confusion. Once you understand how they work you’ll realize that they’re actually extremely simple and straightforward.
Ejection Delay
Every motor that has an ejection charge has some delay associated with it, which represents the number of seconds after motor burnout that the ejection charge will fire. Motors will either come with a fixed delay (such as Estes black powder motors or Quest Q-Jets), an adjustable delay (such as many reloads), or no ejection charge at all (such as most of the larger high power motors). Either way, you should always make sure your desired delay is set when you select a motor. The flight simulations will tell you how well you’ve chosen.
There are two ways to set the delay. First, you can choose from available options in the pull-down list:
These represent the available preset delays offered by the manufacturer, plus a plugged option which means that the motor will have no ejection charge (sometimes this option is directly offered by the manufacturer).
For many black powder motors, the first option shown is -0. Generally, you should only select this option if you are configuring the booster of a multi-stage rocket. Always set a reasonable value, check your sim results to see how well you’ve chosen, then come back and adjust the delay if needed.
What may not be as obvious is that you can also just type your own value into the combobox, e.g.:
This is good for when you have a composite motor with adjustable delay. You can type in just about any value here.
Thrust Curve
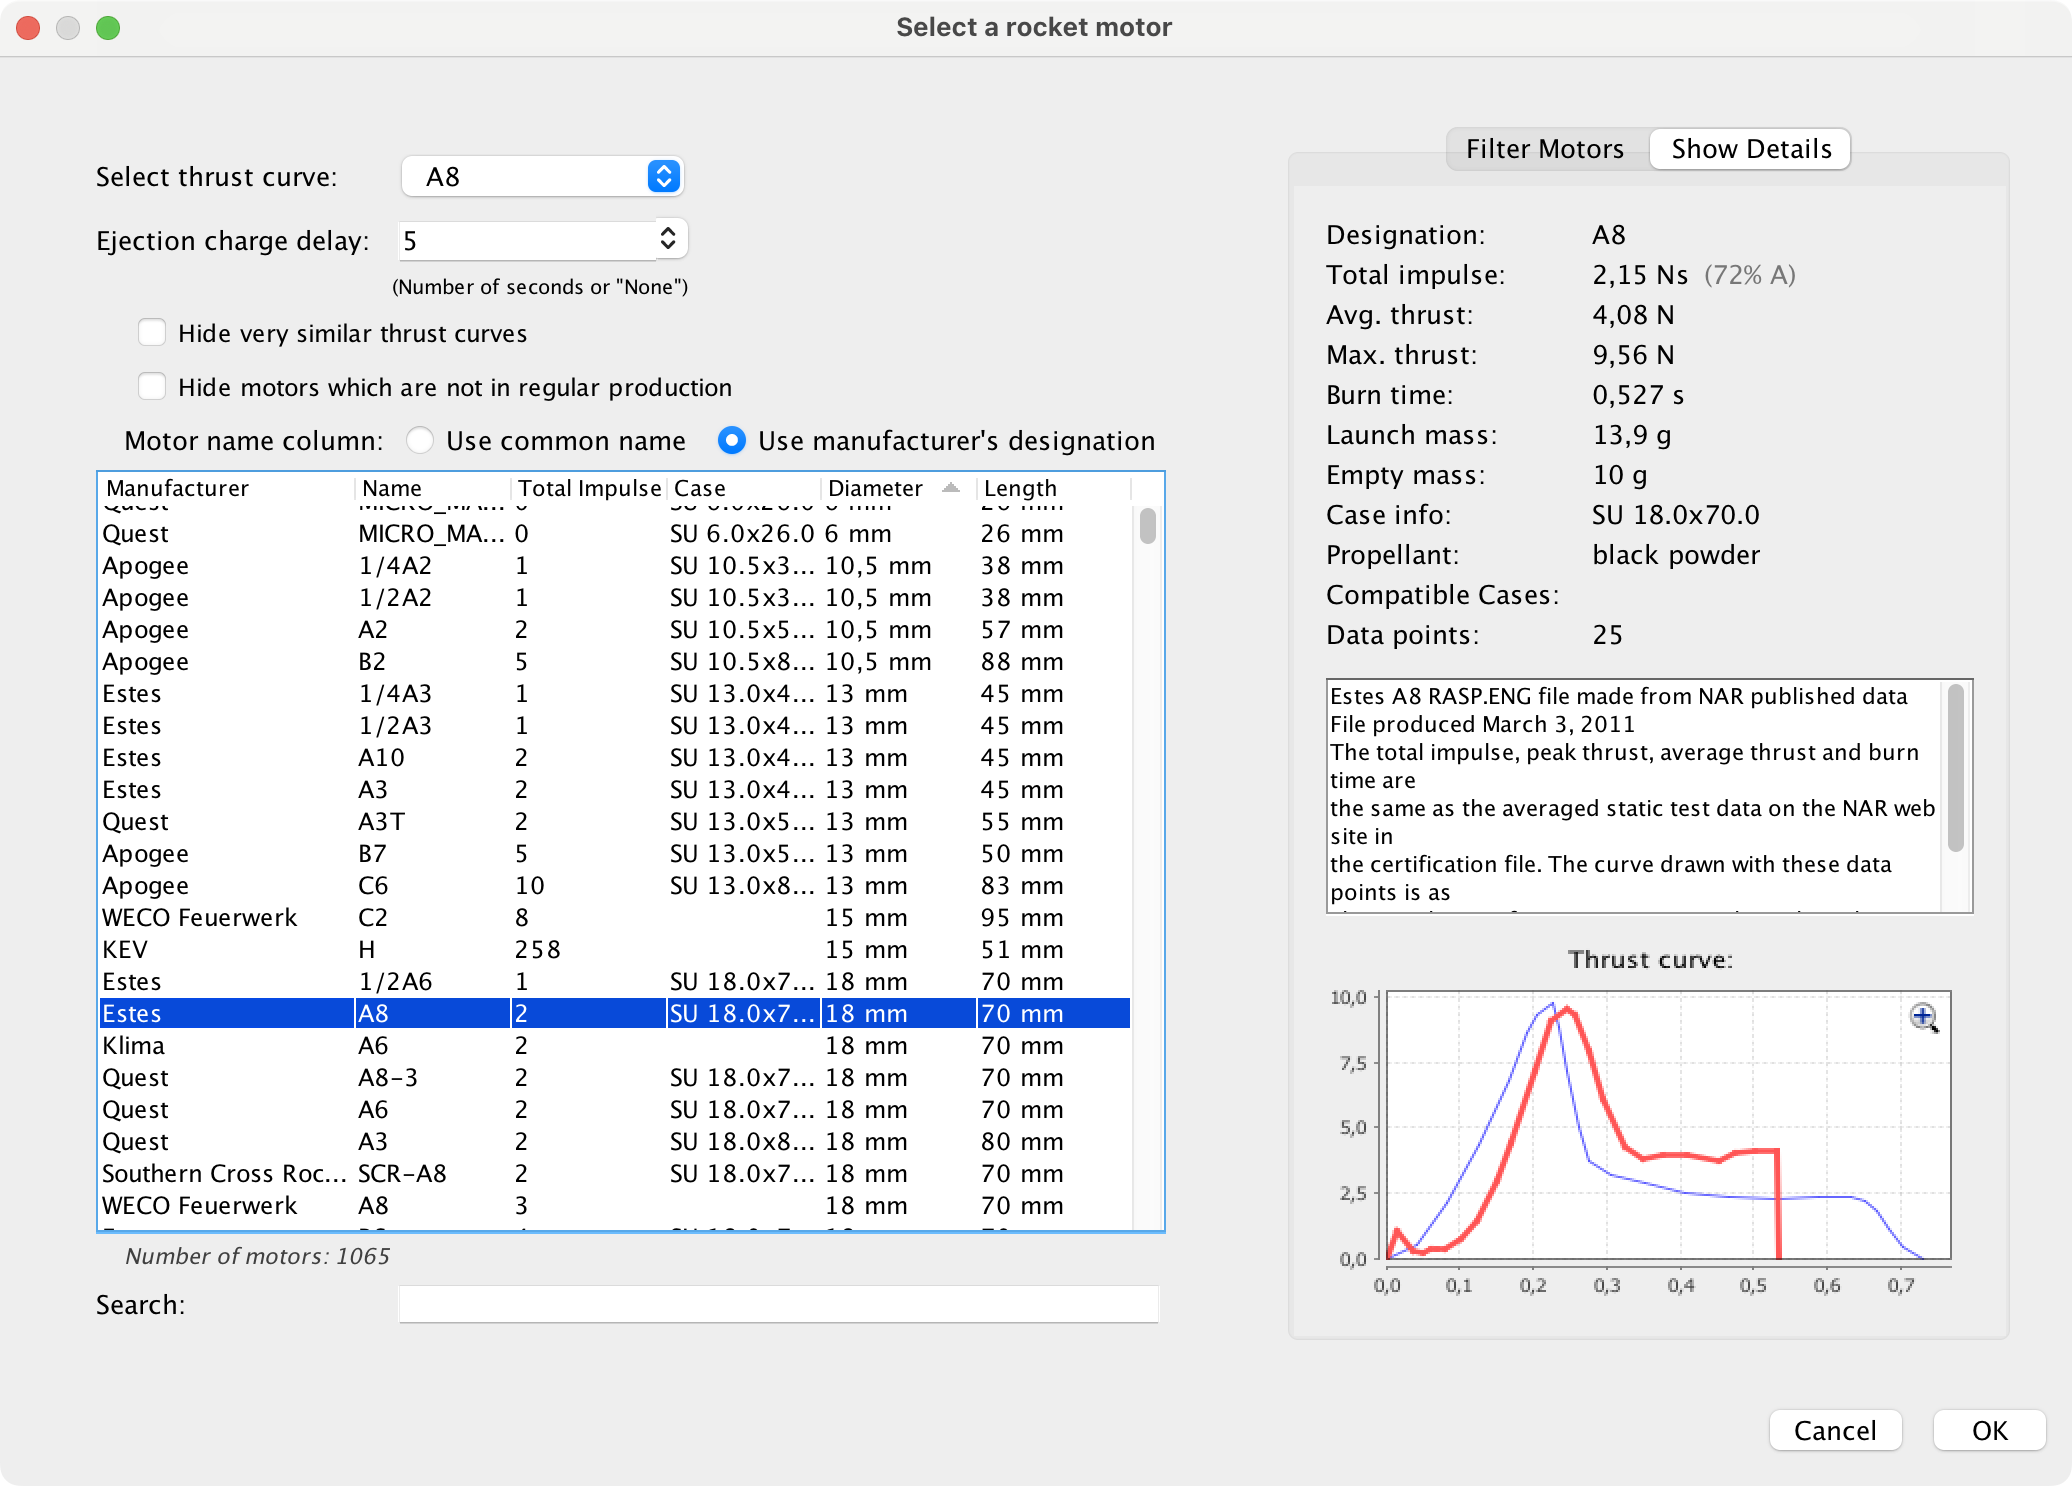
Let’s click over to the Show Details tab on the right. This shows a bunch of detail about the motor that comes from its thrustcurve file. We see that there are two different thrust curves for the A8, a red one and a blue one.
This means that there are more than one thrustcurve file for this motor. The red line is significantly heavier than the blue, which means that the thrustcurve file with the red curve is currently selected, and will be used in the flight simulations. Likewise, the details shown above the curve are from that file. You can also see this by clicking on the Select thrust curve pulldown:
When you click on the pulldown, you’ll see a list of the available curves (each from its own file), color-coded, with the selected curve highlighted and checked. If you wanted to use the blue curve, just select that one:
Now you’ll notice that the blue curve is heavier than the red, and the details have changed.
Why are there multiple curves in the first place? The thrustcurve files on thrustcurve.org comes from different certification organizations. The text box in the Show Details tab often gives useful origin information for each curve.
Finally: there can be more than two curves (three is probably the most you’ll ever see); each will be shown in a different color.
Noticed a mistake? Please notify us at openrocket-website@lists.sourceforge.net.